The Most Effective Spartan Race Obstacles Tips You Need to Know
This guide contains all the obstacle tips and techniques to used during a Spartan race. Learn how to master the obstacles like a pro.

You are tired of all the burpees because you failed the obstacles? Would you like to bring your OCR game to the next level and learn how to master the obstacles?
I know that finding good tutorials can be challenging. I wish I had a guide when I started with Spartan race and obstacle racing. Therefore, I decided to create my own and gathers ALL the obstacles tips in one ultimate guide.
I have pulled all the videos and tutorials from all over the Web, plus and I added my tips and secrets that I learn the hard way.
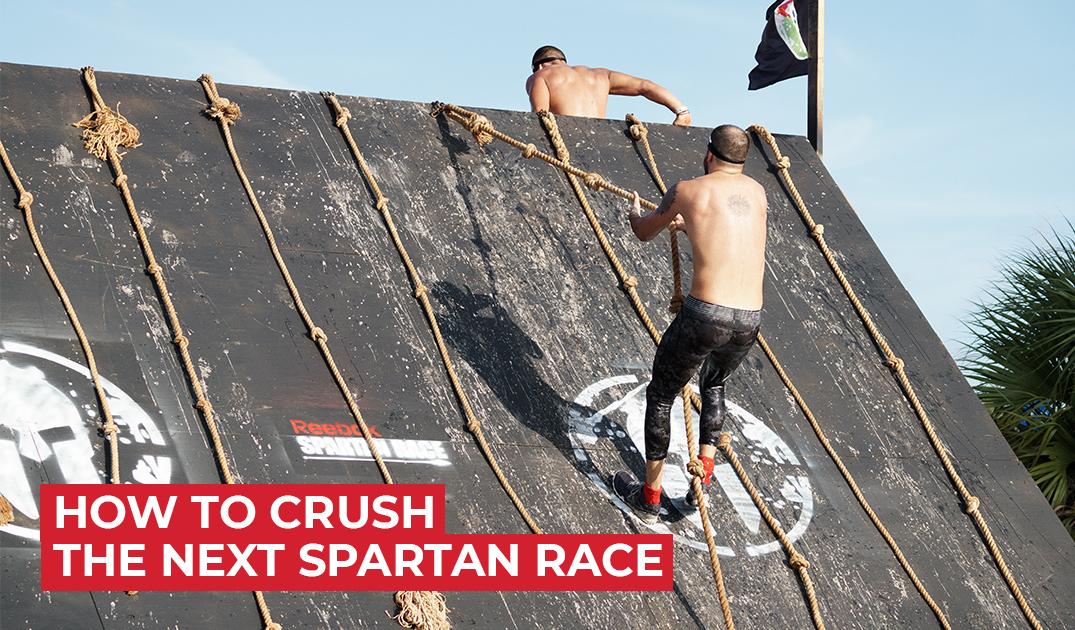
This guide contains everything you need to know to crush your next Spartan Race.
- A-Frame
- Adductor
- Ape Hanger
- Atlas Carry
- Balance Beam
- Barbed Wire/Low Crawl
- Beater
- Bender
- Bucket Brigade
- Helix
- Hercules Hoist
- Hurdle
- Inverted Wall
- Log Carry
- Monkey Bars
- Olympus Wall
- Over-Under-Through
- Plate Drag
- Rope Climb
- Sandbag Carry
- Slackline
- Slip Wall
- Spartan Ladder
- Spartan Rig
- Spear Throw
- Stairway to Sparta
- Tarzan Swing
- Tire Flip
- Tire Pull
- Tractor Pull
- Traverse Wall/Z Wall
- Twister
- Tyrolean Traverse
- Vertical Cargo Net
- Wall Jump
If you're searching for the best shoes to wear for a Spartan Race and expecting to find a real review from a real runner. Check out this list I created of the top OCR footwear.
A-Frame
Technique 1: Climb the A-Frame with your hands and feet, exactly like on standard ladder. Once you reach the top, place one leg over, sit on the apex and switch side. On you're way down you'll be facing the cargo net, just like on a conventional ladder.
Technique 2: The more advanced method is, once you arrive at the top, you grab the cargo net on the other side with both hands and do a front roll to the opposite side. You'll finish climbing down, facing forward, in a crab walk movement.
Check out my training tips for the A-Frame
Adductor / Thigh Master
Technique: Grab the first bag of the Adductor with your whole body and hold on tight. Use one arm to reach the next one, while you squeeze the bag your on with your thigh. Make sure you have a good grip on both bags and rapidly wrap your legs around the following one. Finally, bring your whole body on the bag and squeeze tight. Repeat until you ring the bell.
Tips: Always reach high on the bag to avoid touching the ground. You might need to use the top of the bag to pull yourself up, but don't use the chains.
Ape Hanger
Technique: The Ape Hanger technique is simple; climb the rope, transfer on the rungs and ring the bell at the end of your lane.
Tips 1: Don't touch the water with your hands, because the rope is already slippery and you don't need an extra wet grip.
Tips 2: Use your feet on the rope climb to preserve arms strength for the rest of the obstacle. Keep moving, because the longer your hanging from the bars, the more energy you'll waste and the less chance you have to reach the bell.
Tips 3: Make sure to use a lane where the bell is still hanging low and not wrap around the structure.
Atlas Carry
Technique 1: Stand above the Atlas ball, squat down and wrap your forearms around the bottom. Push your hands as far under as possible. While you squeeze the stone with both arms, tighten your core, push on your heels into the ground and use your whole body to muscle it up. Walk with the ball to the flag, drop it and do 5 burpees. Bring back the Atlas ball at the starting line.
Technique 2: Put one or two knees on the ground and roll the Atlas ball on your leg, until you can wrap your arms under. This technique is especially useful if the stone is buried in the mud or dirt.
Check out my training tips for the Atlas Carry
Balance Beam
Tips: You don't have to complete the obstacle in one take. Cross the first section of the balance beam. Then, use the angle or the joint to take a break and regain your balance. Just place your feet on each part and take a breath before moving on.
Barbed Wire/Low Crawl
Technique 1: The most effective method is to roll under the barbed wire. You'll save a significant amount of energy with this technique. Take a small break and pace yourself or alternate side to avoid dizziness. A good rule of thumb is to switch side every 10 rolls.
Technique 2: The most common and versatile method is to crawl forward using your arms and knees. Crawling is more appropriate than rolling for the uphill or downhill section of the obstacle. Because you'll be more in control of your movement, more aware of your surroundings and therefore more respectful to the other racers.
Technique 3: When the barbed wire is too low, it's better to crawl on your back. You're legs and shoulders will take care of the crawling, while your hands will push the barbed wire away.
When you get to the Barbed Wire Crawl, scan the obstacle and select your lane wisely.
Tips 1: Look at the space available to crawl and the condition of the terrain. The best path to take is near the stakes, in the middle or the edges. This section is where the barbed wire is attached and usually higher off the ground.
Tips 2: Consider the condition of the terrain. Is it muddy, with uphill or downhill section? If so, you'll need to adjust your pace and choose the right technique (crawl or roll).
Tips 3: Protect your skin from the inevitable scratches and cuts, by wearing long sleeves and high compression socks or pants. It's the reason why I always wear a pair of lightweight tights under my shorts.
Tips 4: During this obstacle, your hydration pack needs to be protected. Since you need to carry all your belongings across this barbed wire, take the following precaution. First, take off your hydration pack and wear it on your chest. Use your arms to save it from getting crush under your weight as you roll under the barbed wire. Otherwise, you'll destroy your hydration pack. Also, make sure the pockets are closed, and the mouthpiece is secure.
Check out my training tips for the Barbed Wire Crawl
Beater
Technique: Grab the bar with bent elbows and move from sideways, so you'll have enough reach to navigate through the random bars of the Beater. Because some bars will be higher, while others are rotating, also, use your momentum to swing and grab up the next bar.
Tips 1: Make sure your hands are dry and mud free before attempting the obstacle. If you can't find a dry spot on your clothes, you can swipe your hands on the hale bale or the grass.
Tips 2: Take off your gloves before crawling into the mud. Otherwise, your gloves will get filled with dirt, and finally, you'll still need to take them off to clean them.
Bender
Technique: Not everyone can climb the bender only with their arms power, so here's the next most effective method.
Reach for the first bar, hold on tight with your hands and swing your legs up there. Hanging from under the ladder, hook your knees around the first bar and grab the second with your hands. Move both legs over the first bar, like you are sitting on it, and use your hands to reach higher. When you have reached high enough, place your feet onto the first bar and start climbing.
Once you reach the top, grab the bar under one arm and move your chest to the other side. Your weight will shift to the opposite direction, you'll feel your feet lifting from the bar, and your legs should follow automatically. Then use your other arms to pull your entire body to the other side.
Climb down like a regular ladder to your initial position.
Tips: You'll need an effective grip, and this means swiping off the mud from your hands before reaching for the ladder. Use your shirt or the hale bale to clean your hands.
Bucket Brigade
Technique 1: Wrap your arms around the bucket and interlock your hands under the front edge. If you just put your fingers under the bottom, you'll have a greater chance to drop the bucket. This locking grip is your security system for when the bucket started to feel heavy (and it will trust me).
Technique 2: If your arms are not long enough to reach the front edge, wrap your arms around the top of the bucket. It's essential your interlock your hands and squeezes the bucket real tight.
Tips 1: The bucket is heavy, and I always take breaks along the bucket carry. The best way is to put one knee down and rest the bucket on your other leg. This way you're not wasting energy picking up the bucket from the ground over and over.
Tips 2: Use the front part of your shorts or pants (drawstring or elastic) to sit the bucket and relieve a little bit of weight from your arms.
Check out my training tips for the Bucket Brigade
Helix
Technique: First, scan the obstacle for the excess of mud on the holds and choose your lane wisely. While you are moving on the Helix, always have 3 points of contact with the obstacle. Which means you only move one arm or foot at the time. Flex your hips and keep your body close to the Helix.
Hercules Hoist
Technique: The goal of the Hercules Hoist is to pull the rope towards your chest until the bag reaches the bell. Also use the gate to get a strong foothold, while you pull the cable with your hands.
Tips 1: Wrap the rope 2 or 3 times around your forearm and clench your fist tight around the cable. It will disperse the weight to your arms instead of relying only on your grip strength.
Tips 2: Use your body weight to pull the sandbag off the ground. Grab the rope, place your foot on the fence and bring your back to the ground. Once you're on the ground, you can still use the weight of your torso, by moving from a sit position to flat on your back. Finish pulling the weight by bracing your self with both feet on the gate.
Check out my training tips for the Hercules Hoist
Hurdle
Technique: The first step is to bring your torso over the hurdles. Start by putting both hands on the barrier and jump, while pushing yourself with both arms. The movement will be similar to coming out of a swimming pool. Once half of your body is over the hurdle, continue by flipping your legs, one after the other.
Inverted Wall
Technique: Climb the Inverted Wall like a standard ladder, while keeping your body close to the obstacle as possible. Once you reach the top of the wall, hook your arm around the edge. Now your goal is to roll your chest over the obstacle. When your head is on the other side, the rest of your body will follow.
Check out my training tips for the Inverted Wall
Log Carry
Technique: Carry the log on your shoulders and use your arm to preserve the balance. Also, keep a straight body by tightening your core and continue walking.
Tips: Scan the different logs available on the top of the pile and choose the right one for you. I don't mean to start moving logs around and grab the bottom one. Just choose wisely from the available options at the top. I prefer to pick the rounded and straight piece of wood because they are more stable and won't hurt my shoulder.
Monkey Bars
Technique 1: Grab the Monkey Bars with both hands facing forward, and move ahead until your ring the bell. You can swing from bar to bar and always reach for the next one. Otherwise, you can move one bar at the time and bring both hands on the rungs before moving to the next one.
Technique 2: Navigate sideways by grabbing the bar from both sides. Your grip will be more stable, and you'll gain more reach. But with this technique, you'll have to move one bar at the time.
Tips 1: When the bars a far apart, use your momentum to swing to the next one. Also, try to move with bent elbows, so you'll have extra reach because you'll be closer to the bars.
Tips 2: Don't stay too long under the bars, because the more you'll be hanging, the less chance you'll have to reach the bell. Also, try to keep the unnecessary sway to a minimum, because it will fatigue your grip faster. Preserve your energy and keep on moving in a controlled manner.
Check out my training tips for the Monkey Bars
Olympus Wall
Tips 1: Not sure which handholds to use on the Olympus Wall? In my opinion, the most effective grips are the holes in the wall. Push your fingers as far as possible inside, expect the thumbs and create a solid hook with your hands.
Tips 2: Use your shoe grip to keep you from sliding down the wall. Therefore, bring your feet high as possible on the wall. Your goal is to be in a squat position with your butt hanging out.
Check out my training tips for the Olympus Wall
Over-Under-Through
You start the O-U-T obstacle by climbing a wall than crawling under the second one and finally you have to go through a hole the size of a small window. To pass the last barrier, depending on your skills level, you have 3 different methods.
Technique 1: The more adventurous will choose to jump head first and do a rollover landing on the other side. I wouldn't recommend this method if you are not 100% sure of your ninja skills or 100% crazy.
Technique 2: The best method is to jump and grab the top of the wall. Then you lift your knees until your legs are through the hole and drop on the opposite direction.
Technique 3: The most common method among beginners is to move one leg at a time to preserve energy.
Plate Drag
Technique 1: Pull the sled moving backward, and watch your steps!
Technique 2: Place the rope around your waist and pull the sled behind you.
Rope Climb
Technique 1: Start by standing beside the rope, jump and reach with your hands high as you can. Pull your self up and use one of the following footing technique.
The first method is called the S-hook. With the rope hanging on the exterior of your legs, place both feet on each side of the cable and push in the opposite direction. You left foot will be placed on the right side of the rope, while pushing left and your right foot will be on the left side of the cable pushing right. Then press on your feet like your trying to stand up and grab higher on the rope with your hands. Repeat until you reach the bell.
I've been using the S hook for the past 2 years, and I find it extremely efficient.
Technique 2: The second is called the J hook. Begin with the rope hanging between your thighs, then wrap it around one leg and over the foot. Use the second foot to push the cable between your shoes.
I've being rope climbing using the J hook, and now I have switched for the S hook. Both work fine, but the J hook can be confusing while your hanging under the rope.
Technique 3: Use only your hands to pull your self to the top of the rope, without using your feet. I wouldn't recommend this method because you'll end up wasting too much energy. Therefore, in my opinion, the previous footing methods are more effective.
Check out my training tips for the Rope Climb
Sandbag carry
Technique 1: You arms will be fatigue from the previous obstacles, and the last thing you need is to carry a heavy sandbag. However, my preferred method is to load the bag on my back, between my shoulders. My hands are still available in case I need to secure the sandbag, but I'm not putting more stress on the arms.
Technique 2: The other popular method is the place the sandbag over your shoulder and switches sides every 15-20 steps.
Technique 3: When your shoulders are too sore, you can always squeeze the sandbag into your chest. Just make sure you had interlock your hands under the bag for extra support.
Check out my training tips for the Sandbag carry
Slackline
Technique: Walk fast on the Slackline with a study pace, by placing one foot in front of the other. Also, you can use your arms to regain balance.
Tips 1: Scan the different lanes and make sure the slackline you chose is tight enough.
Slip Wall
Technique: Climb the Slip Wall using the rope and after you reach the top, hook your arm over the obstacle. Once, you have a firm grip on the wall, move one of your legs to the other side. The rest of the body will follow, and you can continue the race.
Tips 1: Walk on the slip wall, like it was flat on the ground, by leaning a little bit backward to create a 90-degree angle with the wall. Because if you are standing too upright, you could slip forward, and leaning too much backward would put a lot of useless stress on your arms
Spartan Ladder
Technique: Use your hands and feet to climb the Spartan Ladder. Pull your body close to the bar and push up with your feet to reach the next bar.
Spartan Rig
Technique 1: On the Spartan Rig, swing from the rings in a pendulum motion, using the generated momentum to reach the next grip. Make sure you have a firm grip with all your fingers wrap around the ring. Place your thumb over your fingers to create a locking mechanism.
Technique 2: Navigate from side to side, using both hands on each grip. Wrap each hand on both sides of the ring. Therefore you'll be reaching for the next ring always with the same arms, and bring your other hands onto the grip. This technique will optimize your grip power and extend your reach potential. Also, it will minimize the stress of hanging from one arm. This technique is convenient in case the grips are covered with slippery mud.
Tips: Use your legs to gain more momentum and accentuate the pendulum motion. The more you swing, the further away you can reach. Wich will bring you faster to the bell and save some precious energy.
Tips 2: Scan the obstacle to choose the correct lane. You'll notice differences between path. Rings will be higher than the others, and different kind of grips are available (ball, rope, nunchuck, cargo net). Also, make sure the bell is not wrapped around the post, and still hanging down ready to be ringed.
Tips 3: You don't know which grip to hold? In my experience, the rings and the horizontal bar have the best handgrip. The balls are not easy, and the nunchucks are only for the strongest Spartan. I prefer to choose a lane with only rings or balls.
Tips 4: Navigate with 90-degree elbows to gain more reach, by staying closer to the grips. This will be especially useful if the grips are not on the same level.
Tips 5: Make sure your hands are not covered with mud and clean them before going under the Multi Rig. Use the dirt on the ground, the hale bale or that last dry spot on your t-shirt. Last resort, use a rock to scrape the mud off your hand.
Spear Throw
Technique: Hold the spear like you would hold a football. Aim at the target with your non-throwing hand with the opposite leg move backward. Hold the spear close to your ear and look at the target with your chest facing forward. Always aim a little bit higher, because the trajectory would look like a small arc. Push in your rear leg, and throw in a straight line.
Tips 1: The spear is attached to a rope, so the participants can safely recover it by rolling back the cable to the fence. Before throwing the spear, make sure you are not standing on the rope, and it will unroll freely.
Tips 2: Take your time. Make sure your breathing is regular and visualize hitting the target.
Tips 3: The movement is similar to throwing a football or a dart. Aim a bit higher on the target and throw in a straight line, while keeping your chest facing the target. Many people do a baseball throw type of motion, and it decenters the axis of the spear.
Tips 4: Hold the spear precisely in the middle. To find the perfect spot to hold the spear, place it on your palm, between the thumb and the index. Your thumb should be pointing backward. Once you have the spear perfectly balance on your hand, firmly close your fist around.
Check out my training tips for the Spear Throw
Stairway to Sparta
Technique: Pull your self over the first section of the Stairway to Sparta, as you would do on a regular wall jump (Ropes might be available to climb the wall.) Once you reach the first section, climb the rest like a regular ladder. At the top, you want to slightly bend your chest over the wall, get a grip on the other side, and move one leg after the other.
Tarzan Swing
Technique: Jump on the Tarzan rope to get the highest grip and pull your body up. Try to keep your elbows at 90 degrees, so you are not hanging from extended arms, which will have you hitting to water. Once, you reach the other side, don't hesitate to let go of the rope and land on your feet. Many people miss this obstacle because they wait too much and end up swinging backward.
Tips 1: Don't grab to low on the rope, because your feet might hit the water.
Tips 2: Don't swing with the rope across your legs, because it will be challenging to dismount once you landed on the other side.
Tire Flip
Technique: Stand in front of the tire in a wide stance with both feet touching the tire. Squat down and reach under with your hands, pushing your fingers as far as possible, while your hips are as close as possible to the tire.
Start lifting by pushing into your heel and not only with your hands. Your hands are just the hooks, while your legs and core will do the lifting part. Also, keep your back straight and tightens your core. You'll need to create an explosive movement and commit to complete the obstacle.
The tires are heavy, but you can do this!
Tips 1: When the tire is half way up you can re-adjust your grip by laying the tire on your front knee or your chest.
Tips 2: Make sure your chest and arms are also touching the tire because they will absorb the weight and the lift will be more comfortable.
Tire Pull
Technique: Begin by sitting behind the little barrier or the stakes where the rope is attached. Brace your feet into the small fence or dig your heel deep into the ground. Then, pull the cable until the tire reaches your side. Complete the Tire Pull obstacle by dragging the tire back to the other side. Run backward with your hands holding the tire.
Tractor Pull
Tips 1: Scan the terrain of the Tractor Pull to choose which path to follow. Some tracks might be muddier than the other, or some obstacles could block the way (rocks or roots).
Tips 2: Always keep an eye on the cinderblock to avoid hitting another competitor or yourself. That thing can do severe damage to an ankle or a foot.
Tips 3: While you are dragging the block, check for mud accumulation. The mud could add extra weight and slow you down considerably.
Check out my training tips for the Tractor Pull
Traverse Wall/Z Wall
Tips 1: The most important tips while climbing the Traverse Wall is always to have 3 points of contact with the surface. Therefore, move one arm or leg at the time.
Tips 2: Your feet are the most important during this obstacle because they will do most of the work. Flex your hips, and keep your chest close to the wall so your center of gravity will stay above your feet. Keep your body as close as possible to the wall. Because the further you are from the wall, the more energy it will take to hold the grips. The ultimate goals would be walking across the wall by only using your feet (but that's mountain goats level type of climbing, so use your hands for extra support).
Tips 3: Scan the obstacle before choosing a lane and watch out for mud accumulations. Slippery footholds are one of the biggest reason why people fail the Traverse Wall. Don't forget to wipe your shoes too!
Tips 4: Use the side arch of your foot onto the foothold. The tip of your shoes might be too flexible or slippery while the side of your shoes has more surface in contact with the hold.
Tips 5: When choosing a lane, always wait until the person in front of your finish the obstacle. Nobody likes to wait in traffic, especially not on the Traverse Wall. You'll end up wasting more energy then you should.
Tips 6: Focus on your hands, and avoid placing both on the same block. Use a wide stance and feel the block with your hand to find the right position before moving to the next one. If you lose grip with one of your hand is a lot harder to recover than with your feet. Make sure you are stable before relying upon that grip.
Check out my training tips for the Traverse Wall
Twister
Technique 1: Grab onto the bars with bent elbows, to maximize your reach because the bars are not on the same level. Move forward till you ring the bell. See this technique in action here (video)!
Technique 2: The most effective way to tackle the Twister, is to move backward. Since your head is always under the next bar, you know exactly where to place your hands. With this method, you'll ring the bell in no time.
Tips 1: Choose your lane carefully and make sure the bars are aligned right. You'll want the handle to move toward you and not away.
Tips 2: Wait for the person in front of you finish, before starting to move under the Twister.
Check out my training tips for the Twister
Tyrolean Traverse
Technique 1: Grab the Tyrolean with your hands and wrap your legs around, until the rope is under your knee. Use the other leg to lock your grip by putting it on top of your other foot. Use your arms to pull yourself on the cable while dragging your legs behinds. Move head first until you reach the bell.
Technique 2: Instead of dragging your feet on the tyrolean you can use them to move faster. By moving the opposite arm and leg simultaneously, in a crawling motion, you will get to that bell more quickly. But pace your self, and make sure to always have one knee above the tyrolean.
Technique 3: When the tyrolean is above water, you can pull yourself on top of the rope, instead of from hanging under. Start, by grabbing on the cable with both hands. Then flip your legs like a gymnast to land with the rope under your waist, while you lay on the tyrolean facing forward. Make sure the tyrolean is going from one side of your head to under the opposite foot. The other leg is hanging completely. Use your arms to pull yourself over the rope, and keep the same position until you reach the bell.
Tips: Wear high socks or compression pants, if you are planning to drag your legs on the rope. Otherwise, you'll have severe burns on your calf.
Check out my training tips for the Tyrolean Traverse
Vertical Cargo Net / Vertical Cargo 2.0
Technique 1: Climb the cargo net like a regular ladder. For more stability, you should have 3 points of contact with the obstacle at all time. Once you reach the top, you'll want to move your torso over and grab the cargo net on in the back. Move one leg at the time, and get one secure foothold on the other side before starting to climb down.
Technique 2: Once you reach the top, bend your chest over the wall and get a firm grip on the structure. Your body should start to flip over the obstacle, and you'll be able to reach for a lower hold on the cargo net. With one hand on the top structure and the other on the cargo net, flip your leg over and land with your feet on the ground. Just make sure to keep your eyes on the ground the whole time. This dismount method is for the athlete who wants to get ahead of the competitors and save every second they can.
Wall Jump
Technique 1: Climbing over the wall can be challenging, especially the 8-foot wall. You'll need to use all your energy and power to reach the top.
Start, by running toward the wall, jump and step on the wall to give you an extra push. Reach for the edge with both hands, and pull your self up. Use the momentum from the jump to bring chin over the wall. At the top, you'll want to place one elbow over the wall as fast as possible. Then push on your elbow, and pull on the edge with your other hand until you can flip your second elbow over the wall. When both arms are above the wall, push with your elbow and bring your chest over the obstacle.
The hard part is done, now you have to bring one leg over and finish climbing. Make sure the decent is smooth, and use your hands to climb down. Jumping off the wall expose you the twisted ankle or worst.
Technique 2: Reach for the top of the wall with both hands. While you are hanging from the edge, start walking up on the wall, until you can bring one leg over. Finally, use your arms and legs to pull your self over. See this technique in action here! (video)
Check out my training tips for the Wall Jump
Conclusion
These techniques will make a huge difference when you're attempting an obstacle. Make sure to study the previous videos and memorize the steps of each obstacle tutorials.
Use these tips in your next Spartan race, and you'll succeed every obstacle.
Now that you learn the secret of the Spartan obstacles, you should work on your endurance and body strength. I would recommend you find a good workout plan, and train specifically for the Spartan Obstacles.
P.S. If you're searching for the best shoes for a Spartan Race and hoping to get genuine advice from a real runner. You should check out this list I created of the top Spartan Race shoes.
I have picked these running shoes because I'd used them in different obstacle races and mud runs. Plus, I'd confirmed my selection with my fellow OCR runners. With all their insights and my own experience, I've built this list of the top obstacle racing footwear.
Thank you for reading!
Hi, I'm the Obstacle Ninja, and I will share with you my tips on how to crush it at your next obstacle racing. Also, how to get your little ninja more active with obstacle course. Want to know more about me? Read my story!

Hi, I'm the Obstacle Ninja, and my passion is OCR (obstacle course running).
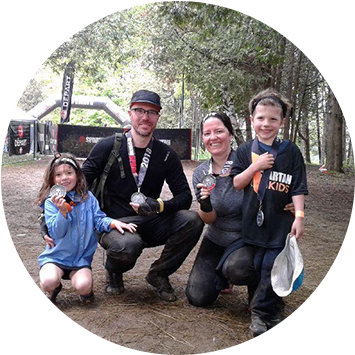
My idea of the perfect weekend is to run a Spartan Race or Tough Mudder with my family. We love to run in the mud and challenge your self with the obstacle. My kids and I, we love to watch Ninja warrior and train for our next obstacle race or mud run.
I will share with you my tips on how to crush it at your next obstacle racing. Also, how to get your little ninja more active with obstacle course.
Want to know more about me?
Read my story!
Got questions? Contact me!
